The third challenge for Season 15 of Project Quilting was announced on Sunday, and the theme this week is "Inside Out:"
"For this week’s project, I want to see what’s normally hidden! Make a project with exposed seams or a raw-edge finish. Take on a bag pattern or other project that is constructed inside out and then literally “birthed” as part of the process. Or use this as a theme and demonstrate your unique inside-out perspective."
I was a little stumped at first on how to interpret the theme. Then I saw a mention on Facebook about reverse applique, and it reminded me of an Alison Glass sew along, The Cozy Workshop, that I had read about recently. The idea is to use cotton jersey knit as the top layer, which is reverse appliqued over a whole-cloth or pieced layer of quilting cotton. The concept reminds me of those pictures we used to make as kids with scribblings of bright crayons as the base layer that were then covered with black crayon. When the black layer was scraped away, the bright colors were revealed underneath. (Does anyone else remember doing this? I described it to my husband, and he had no idea what I was talking about.)
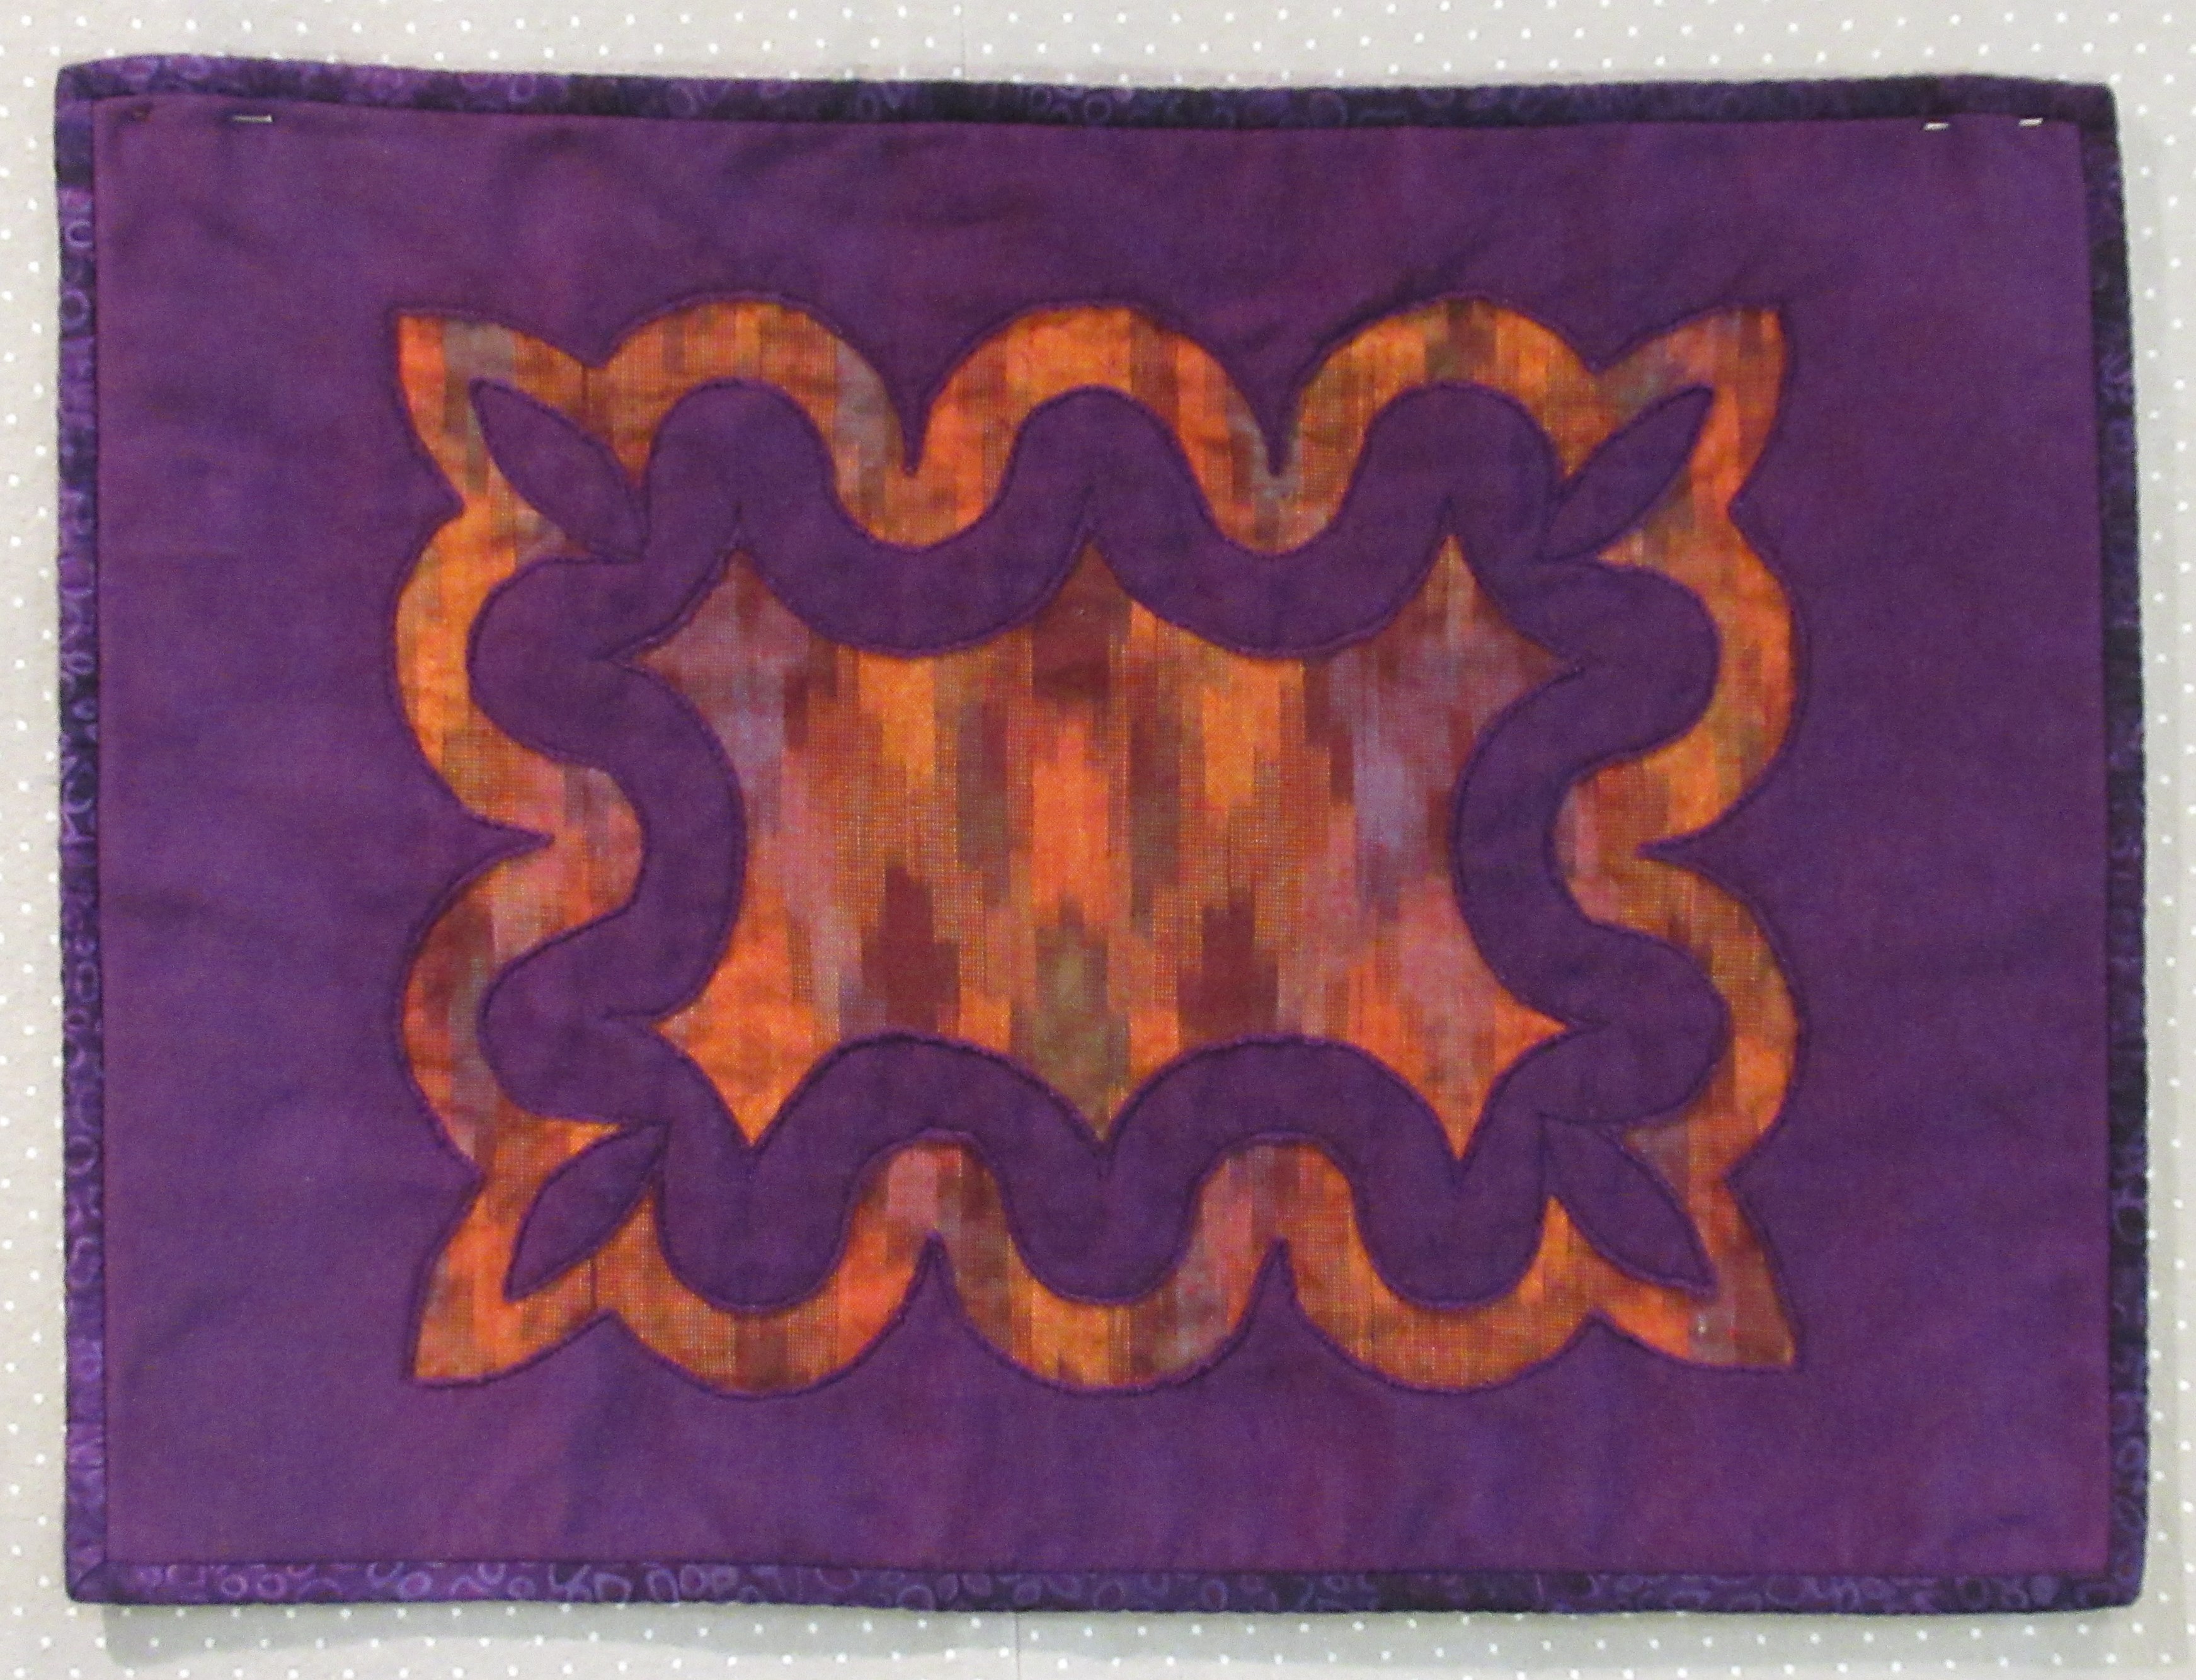
I pulled out a colorful brushed woven fabric for the inside layer that would be revealed by the reverse applique.


This is placemat #1 after the trimming was complete and the binding was finished, but before washing.


After washing, the cut edges were definitely more frayed, but not too bad, and the whole thing is more crinkled.

After washing and drying


After that was done, I decided to do another using cotton knit as the top fabric, just to see how well it worked. As I mentioned at the beginning, I was inspired by an Alison Glass sew along, The Cozy Workshop. However, my technique may be quite different because I haven't done the workshop, just read about it.
Other than using a knit fabric for the top layer, everything else was done in the same way as the first placemat. The layers shown in the next photo include a blue plaid flannel that was my batting substitute (I ran out of the black.)


Placemat #2 back

The placemat with the knit fabric on top definitely frayed less along the cut edges. It wasn't any easier to cut away the knit fabric, but that might be because my stencil design had deeper curves and narrower channels. It was a fun experiment in reverse applique, and the placemats will be another addition to the stack going to Meals on Wheels.
Linking up with:
Project Quilting 15.2 at Persimon Dreams
Finished or Not Friday at Alycia Quilts
Can I Get a Whoop Whoop at Confessions of a Fabric Addict
Happy quilting everyone!
Julie in GA

These turned out great and are a perfect example of "inside out"! Was the knit very stretchy to work on?
ReplyDeleteI definitely remember the crayon thing, scratching away the black to reveal the bright colors. As a child of farmers in the 1940s and 50s, we didn't have much, but we always had crayons and paper to work with.
ReplyDeleteThis turned out beautifully! Great work!
ReplyDeleteGrad Girl had some "coloring" books where you scraped away the black to layer to reveal a pattern underneath. Both placements turned out beautifully. Great interpretation of the challenge!
ReplyDeleteThat is SUPER cool!!! LOVE how you met this challenge!!!!
ReplyDeleteFantastic interpretation of the theme, Julie! I'm so prone to cutting what I'm supposed to save and saving what I'm supposed to cut that I can only imagine what kind of disaster a project such as yours would have been for me!
ReplyDeleteLovely placemat. I am making for Meals on Wheels also!!! Great minds think alike!
ReplyDelete